Bonsai Tree On Milk Glass
Tutorial
For Paintshop Pro 6 or 7.
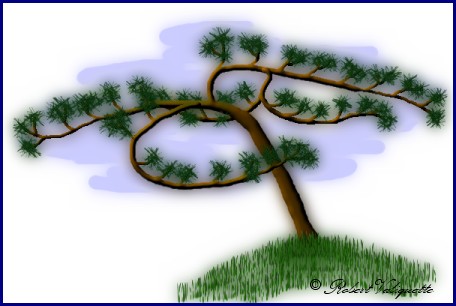
This Image was inspired by a paper table place mat in a local Oriental Resturant. It is really quite simple to make and once you get the hang of it will be able to make it from start to finish in about 15 min.Thanks to Jana of Ladynorth Designs for the method of making the Milk Glass Effect. This tutorial gives best results with a Pine Needles tube. I made mine from a tutorial by Amy of Blue Daffodil. You could also use any of the leaf or pine tubes that come with PSP. Although this tutorial also works in PSP 7, not all of the tools are in the same place as in PSP 6. I have not given the instructions for PSP 7, but the tools are the same and their location are very easy to find. You may find it much easier to follow this tutorial if you print it out before beginning. To print, first make sure your printer is turned on. Click on File/Print or if your browser has a Print Icon then click on the icon.
2. I prefer to make all my layers at the beginning so they are ready when I need them. Layers/New Rastor Layer. Name it, Underbranch. Layers/New Rastor Layer. Name it, Mainbranch. Layers/New Rastor Layer. Name it, Overbranch. 3. Activate the Mainbranch layer. . 4. Set Foreground colour to Dark Brown, I used #5F3B01. 5. Paint Brush/Round/Size 4/Hardness 100/Opacity 100/Step 25/Density 100. Draw the basic outline of your tree. It is not necessary to follow my tree exactly, just remember to lean the trunk and keep the branches sweeping in a nice arch. I started at 400x320 and made my outline shown in fig 1. Because we are doing this freehand your outline will not be the same as mine so the ruler reference points given are just to give you an idea of where I started each part of the tree.
6. Change the Paint Brush size to 8. The objective now is to build up the thicker portions of the tree. I started at 190x150 and carefully worked my way all along the bottom or left side of the tree down to the base of the trunk. I then went to 200x135 and did the same thing again. Then I went to the upper or right side of the trunk and again worked back to the base. Then I went to 470x115 on the right branch and worked back to where it joins the trunk. See fig 2.
7. Change the Paint Brush size back to 4. Now draw a series of smaller braches as shown in fig 3. Be sure to leave the area indicated by the black lines empty, we will put another branch her later.
The next step is the most difficult because it is time consuming and boring. If you don't mind your tree having slightly jagged edges then skip step 8 and go on to step 9. 8. Choose the Retouch Tool/Round/Size 2/Hardness 50/Opacity 50/Step 25/Density 100. Work your way around the outside of the thicker portions of the main trunk and secondary branch, to soften the edges. Work carefully, you do not want to soften too much, just enough to remove the jaggies on curves as in fig 4. I do not bother to do this to the smaller branches. Choice is yours.
9. Choose Magic Wand/Match Mode RGB/Tolerance 0/Feather 0/Sample Merged - unchecked. Click anywhere on your tree to select it. 10. Choose Image/Effects/Inner Bevel with these settings:
Click Ok. 11. Choose Selections/Select None. Activate the Overbranch layer. 12. Choose Paint Brush set to size 6. Draw a branch as shown in fig 6.
13. Change the Paint Brush size to 4 and add smaller branches as in fig 7.
14. Move to the area on the main branch that we left empty in step 7, fig 3. 15. Choose Paint Brush set size to 8. Draw a branch as shown in fig 8.
16. Change Paint Brush size to 4 and draw in the smaller branches as in fig 9.
17. Choose Magic Wand with same settings as step 9. Hold down the shift key and click on both of the new branches we just made to select them. 18. Choose Image/Effects/Inner Bevel with same settings as step 10, fig 5. Click Ok. 19. Choose Selections/Select None. Activate the Underbranch layer. 20. Choose Paint Brush set to size 6. Draw a new branch as shown in fig 10.
21. Change the Paint Brush to size 4 and draw in the smaller branches as in fig 11. You may want to turn off the Mainbranch layer to do this. I don't because I want to see where it is going in relation to the mainbranch.
22. If you want to soften this branch do it now with the Retouch Tool set to the same settings as in step 8. 23. Choose the Magic Wand same settings as before. Click on new branch to select it. 24. Choose Image/Effects/Inner Bevel, same settings as before. Click Ok. 25. Choose Selections/Select None. Activate the Underbranch layer. 26. Choose Tubes/Pine Needles/Scale 20/Random/Random/Step 10. Place the cursor approximately 1/4 inch down from the tip of one of the small branches, press and hold the left mouse button as you make a circular motion around the tip of the branch. See fig 12.
27. Do the same thing for each of the small branches on this layer. 28. Turn off the Background layer. 29. Choose Layers/Merge/Merge Visible then turn the Background layer back on. 30. Follow step 26 to put the Pine Needles on all the remaining branches. Your tree should now look something like fig 13 when you are finished.
The tree itself is now completed. 31. If you would like to keep the tree in it's present form for use in other projects make it into a tube now. After the Milk Glass effect is added the tree will not be much good for other uses. For those unsure of how to make a tube just follow these steps: a. Make sure all the layers are turned on. b. Choose Layers/Merge/Merge Visible. c. Choose File/Export/Picture Tube. d. Do not change any settings on the pop up window. Type in a name for this tube in the Tube Name Box. Click Ok. Your tree is now a tube. 32. If you merged the layers to make the tube, choose Edit/Undo Merge Layers. Activate the Merged Layer. If you would like to dress your image up with birds, flowers or other items, in other words be creative, do it before starting step 34. 33. Choose Tubes/Grass Blades/Scale 10/Random/Random/Step 25. Place some grass around the base of the tree. Pick a starting point on one side of the base, press and hold the left mouse button as you move the cursor along the base of the tree. Then make a few more passes to add the grass. See fig 14.
34. Change the Foreground colour to light blue, #8CE2FE. 35. Choose Airbrush/Round/Size 20/Hardness 80/Opacity 80/Step 25/Density 100. Paint in a few sweeping strokes for sky. Not too much. See the finished image at the top of this tutorial for an idea of how much. 36. Choose Layers/Merge/Merge All Flatten. Your image should now have a white background. 37. Choose Layers/Duplicate. 38. Click on the Layers Palette and make sure the Copy of Background is selected. Right click on the Copy of Background. Left click on Properties. Click on the Blend Mode pull down menu and choose Darken. Click Ok. 39. Choose Image/Blur/Gaussian Blur. Set radius to about 8.00 or 9.00. Click Ok. Congratulations, your image is now finished. I hope you enjoyed working with this tutorial as much as I did putting it together. Cheers Eaglefeather
|

|
|
The entire contents of this tutorial � Robert Valiquette, aka Eaglefeather, January 2001.
All rights reserved.
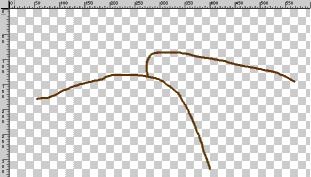 Fig 1.
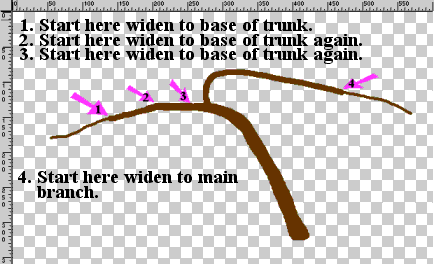 Fig 2.
 Fig 3.
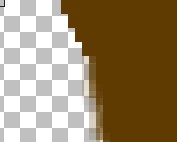 Fig 4.
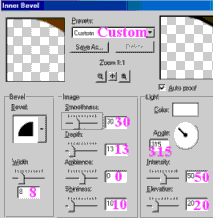 Fig 5.
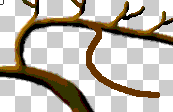 Fig 6.
 Fig 7.
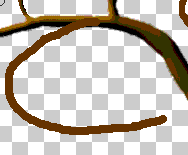 Fig 8.
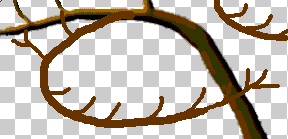 Fig 9.
 Fig 10.
 Fig 11.
 Fig 12.
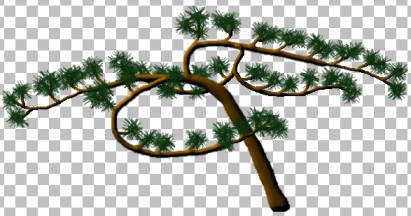 Fig 13.
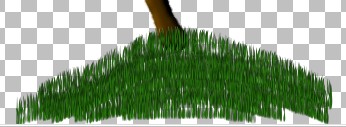 Fig 14.