Fancy Easter Eggs
Written for PSP 6.
(PSP 7 users please note, this will work in ver 7 however tools may be located differently then stated in the instructions. Also, draw all elipses using the right mouse button.)
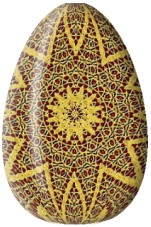 Made with Fig 4 pattern. |
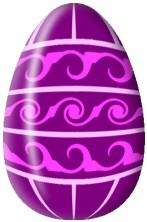 Made with Fig 5 pattern. |
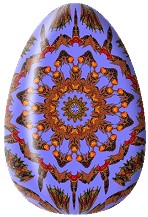 Made with Fig 6b pattern. |
You may print this tutorial for your own personal use.This tutorial is a method for making fancy Easter Eggs. Although I used PSP 6 to put this tut together it will also work in PSP 7. There are a number of different ways to make the decorative pattern part of the egg. For this tutorial I will be using the lace pattern, fig 4, however the basic steps are the same whatever your decorative pattern preferences may be. Please note that the link to Westonmi's Lace tutorial has been removed. When I find the new address I shall re-link. The lace used for the egg in this tutorial was made following part of a tutorial for lace by Westonmi. After Step 9 of the tut, I went to Selections/Select All. Then Selections/Modify/Select similar. Then went to Flood Fill/Sunburst Gradient/Gold-diz and flood filled inside the lace with the gold colour. (I placed this info here so you would know how the lace effect was achieved.) Also a big thank you to Westonmi for an excellent tutorial. The decorative pattern on Egg number 2 was achieved by making a flat design with Draw tool/Single line then Image/Deformations/Curlz, fig 5 below. For pattern number 3 the garden vegetables tube was used on a dark blue background, see fig 6a, then the Kaleidoscope gave the final pattern, see fig 6b. Sorry. The zip files cannot be dl'd from this site. Will rewrite this as soon as possible. Each of these decorative patterns is in an individual zip file. If you wish to use one of them during this tutorial, just click on the one you want. Save it to your HD, unzip and open in PSP.
Just so we all are working from the same plan, all ruler references are given for the top ruler first then the side ruler. ie: 200x300 means the ruler marker should be on 200 on the top ruler and 300 on the side ruler. Also the word "Choose" is used for selecting tools from the tool bar and "Go to" for items on the main menu.
Let's begin. 1. Open a new image 400x400/Transparent/16mil colours. 2. If you are making your own pattern go on to step 8 after your pattern is ready. If you are using one of the ones provided above, go to step 3. 3. Open the pattern you have chosen. (It will open as a seperate image from the new blank image we just made. 4. Go to Edit/Copy. 5. Close the pattern image, it is not needed anymore. 6. Go to Edit/Paste/As new layer. 7. Go to Image/Sharpen/Sharpen. 8. Go to Image/Deformations/Circle. 9. Set the Foreground color to White or any other colour which will show on top of your bg. 10. Choose Preset shapes/Elipse/Stroked/Size 1/Antialias checked/Create as Vector checked. Draw an elipse from 200x200 to 330x400, see fig 7. (Note: I have made the line much thicker so it will show in this reduced image.)
11. Go to View/Grid.
12. Choose Node Edit,
13. Go to Layers/Convert to Rastor. 14. Choose the Magic Wand/Match Mode - RGB value/Tolerance 0/Feather 0/Sample merged - unchecked. Click once on the left, outside your egg shape, hold down the "shift" key and click once on the right, outside the egg shape. You should now have marching ants all around the outside edge and around the egg shape. 15 Go to Layers/Merge/Merge Visible. 16. Press the "Delete" key or go to Edit/clear. This should delete everything outside the egg shape. See fig 10.
17. Go to Selections/Select None. 18. Go to Image/Resize/Percentage of Original/Width 90/Height 90/Resize type: Smart Size/ Resize All Layers - Unchecked/Maintain aspect Ration - checked and set to 1. Click Ok. 19. Choose the Selections tool/Rectangle/Feather 0/Antialias - checked. Draw a rectangle around the outside of the egg. See fig 11.
20. Place the cursor on the egg and left click once. The marching ants should now be all around the outside of the egg. 21. Go to Selections/Modify/Contract, use 3. What we are doing here is getting rid of the white line we made to make the egg shape. However, the line is so thin it may barely be showing on your pattern. If that is the case you may want to ignore step 21 and go right to step 27. 22. Go to Selections/Invert. 23. Press the "Delete" key once or go to Edit/Clear. 24. Go to Selections/Select None. 25. Choose the Selections tool/Rectangle, same settings as before. Again draw a rectangle around the outside of the egg. 26. Place the cursor on the egg and left click once. 27. Go to Image/Effects/Cutout. Use these settings. Fill interiour with color - Unchecked/ Shadow Color - White/Opacity 53/Blur 27.6/Offsets - Verticle 1/Horizontal 11. 28. Go to Image/Effects/Cutout again. Change the Shadow Color to Black and Horizontal to -11 (thats minus 11), all the other settings remain the same. 29. Go to Selections/Save to Alpha Channel. Click Ok, Ok. 30. Go to Selections/Select None. 31. Go to Layers/New Rastor Layer. 32. Choose Preset Shapes/Elipse/Filled/size 1/Antialias checked/Create as Vector Unchecked. Draw an elipse from 200x200 to 270x375. See fig 12. Note: For this step you are interested in the white part of the image not the marching ants part. The image for step 32 and step 33 were combind to save space. 33. Choose the Selection tool/Elipse/Feather 0/Antialias checked. Draw an elipse from 210x210 to 280x400. See fig 12.
34. Press the "Delete" key or go to Edit/Clear. 35. Go to Selections/Select None. 36. Go to Image/Blur/Gaussian Blur/Radius 6.02. 37. Go to Layers/Merge/Merge Visible. 38. Go to Selections/Load from alpha channel. A white egg shape should be in the viewer. Click Ok. 39. Go to Selections/Invert. 40. Press the "Delete" key or go to Edit/Clear. This removes any overflow from the Gaussian Blur. 41. Go to Selections/Select None. There you have it, one Fancy Easter Egg. I hope you have enjoyed working with this tutorial as much as I did putting it together. Eaglefeather |

|
|
The entire contents of this page � Robert Valiquette, aka Eaglefeather, 2001.
All rights reserved.
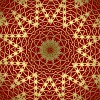
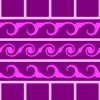
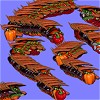
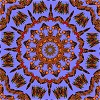
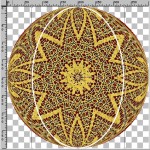 Fig 7.
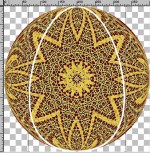 Fig 9
Fig 9 Fig 10.
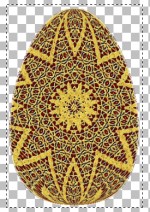 Fig 11.
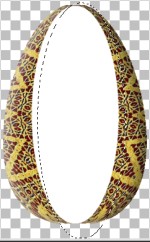 Fig 12.