Making A Hair Tube
For PSP ver 6 or 7
(PSP 7 users please note that tools may not be located as indicated in the instructions.)
This tutorial is a direct result of a request for a tube to make hair. It is a very simple process and only takes a few minutes. After completing this tutorial you will be able to make tubes for any hair style that you might need.Before we begin you will have to set up the grid to make the tube. To set the grid go to File/Preferences/General Program Preferences. Click on the "Rulers and Units" tab, this will bring up the setup window for the grid. On the right side under "Grid" set the Units to Pixels, the Horizontal spacing to 50 and the Verticle spacing to 50. Choose whatever colour you like for the grid itself. (See fig 2.)
Ok, let's begin. 1. Open a New Image/200x150/transparent/16mil colours. (Note: For the purposes of this tut we will use a grid of 4 across and 3 down which will give us 12 hairs for the tube. Once you have played and experimented with this process a bit you may find that you would prefer to have more individual hairs in the tube set. For example a grid of 4x4 will give you 16 individual hairs and therefore a much better product. It is entirely up to you to build this tube any way you want it, so experiment to find out what works best for you.) 2. Go to View/Grid. Your grid should now appear on the blank image. PS: The grid is only visible in the work area, it is only a guide and does not save. See fig 3.
3. Set the Foreground colour to whatever colour you want the hair to be. For this exercise I will use #CF7205. 4. Choose Paintbrush/Round/Size 2/Hardness 100/Opacity 100/Step 1/Density 100. Now it is simply a matter of drawing an individual hair into each box and changing its position slightly each time. How you draw the hair's will determine what the hair will look like when you use the tube. For example if you make each hair straight that is basicaly what you will get. We will do a couple of different styles so you get the feel for it. 5. This one will give a curly hair effect. See figs 4 and 5.
6. This one will give a straighter look. See figs 6 and 7.
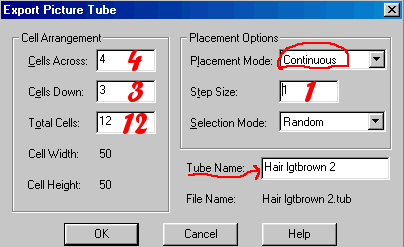
Now this is the part that may cause you problems, saving the hair as a tube. In order to get the individual hairs to randomly place during your painting you must save it as a tube correctly. Go to File/Export/Picture Tube. You will get the following settings screen. Look closely at fig 8.
Make very sure you put in the correct number of cells in the (Cell Arrangement) boxes, PSP will automatically tally up the Across and Down to give the Total. Now on the right side, "Placement Options". Set the "Placement Mode" to Continuous. Set the Step Size to 1, this is very important, if you set it to something else you will not get hair. Set the Selection Mode to whichever you want. I use the Random setting. Finally, in the Tube Name box, type in a name for your tube. There we go, all done dided. Hope you had fun and that you found this tut useful. Cheers Eaglefeather |

|
|
The entire contents of this page � Robert Valiquette, aka Eaglefeather, February 2001.
All rights reserved.
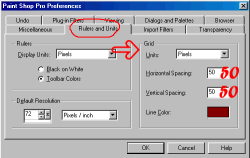 Fig 2.
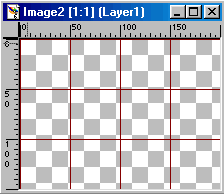
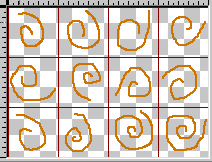 Fig 4.
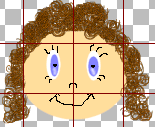 Fig 5.
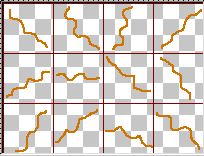 Fig 6.
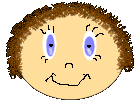 Fig 7.
