Basic Heart Shape
How to make it and save it as a tube.
Written for PSP 6 but will work with PSP 7.
(PSP 7 users please note that tools may be located differently then stated in this tutorial. Also draw circles using the right mouse button.

This is a basic tutorial for beginners on how to create a heart shape and save it as a tube for use with other projects. You may find this tutorial much easier to follow if you print it out. To print it make sure your printer is on, click on the print icon of your browser or click on File/Print.
Should you run into problems or have any questions please send me an email.
2. Set your Foreground colour to whatever colour you want. I used red. Turn on the rulers. (View/Rulers).
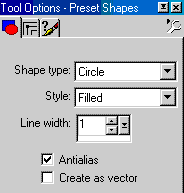
3. Choose Preset Shapes,
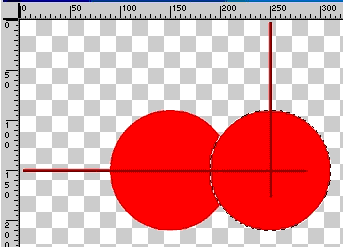
4. Place the cursor at 150x150 and draw a circle to 210x210. 5. Edit/Copy. 6. Edit/Paste/As New Selection. Place this second circle at 250x150 and click once to set it in place.
7. Selections/Select None.
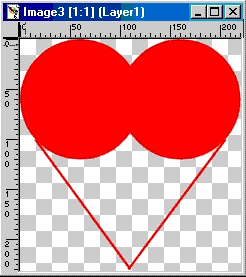
8. Choose the Draw Tool,
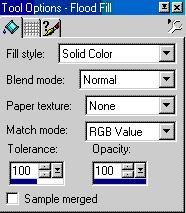
9. Choose the Flood Fill Tool,
Place the cursor in the transparent area inside your image and right click once to fill the heart. It should look like this:
10. As you probably noticed we have an ugly outline inside our heart and there may be a bit of a jagged line where our two straight lines joined the circles. The ugly outline resulted from having Antialias checked in Step 3. However if you do not check Antialias the whole outside edge of your image will be jagged. The jagged edge where the circle and lines meet resulted because the beginning of the straight line was not perfectly matched up with the circle. If you did not get a smooth join it will look something like this:
It is not really a problem because they are easy to fix. We will be using two, possibly three tools to accomplish this. The Magnifyer Tool, The Paintbrush Tool, The Retouch Tool, For this process the pixels are much too small to work with comfortably. So it is necessary to enlarge them. This is where the Magnifyer Tool comes in. First check your image. Did the lines join the circle smoothly? If not, choose the Magnifyer and place the cursor overtop of the area you want to enlarge. Now as you enlarge you will have to keep moving the cursor overtop of the area you are enlarging. Each right click enlarges the image by one. I like to work at around 12:1 so I would have to click over the spot 11 times to bring it up to the 12:1 ratio. Go ahead and enlarge the image to a size you feel comfortable with. If your outside edge was jagged it should look something like the area inside the black circle.
11. To fix this choose the Paintbrush set to size 1 and add a few pixels along the outside edge to smooth out the join. If you had to add more than one or two pixels it will be necessary to use the Retouch Tool set to size 4, with Hardness and Opacity set to about 60, to make sure you have a smooth edge. Just place the cursor over the new pixels and click once. Becareful, if you click too many times you could end up with problems that are much harder to fix. It should look like this after applying the fix.
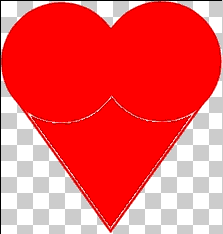
Once you are happy with the result move over to the other side and do the same thing with the other line. 12. When you have the lines fixed, if they needed fixing, choose the Paintbrush Tool set to size 4 and paint over the partially clear outline that resulted from the Flood Fill. 13. When you have completed the clean up choose the Magnifyer Tool and right click anywhere on the image to reduce it back to normal size. In my case that would be 11 times. Your final image should look like this:
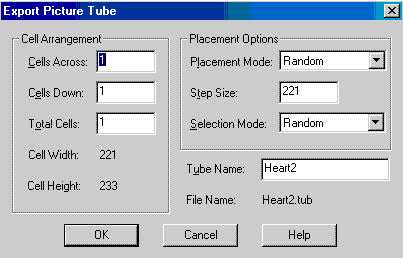
If you would like to save your heart as a tube for future projects, the following steps will show you how. In order to save an image as a PSP Tube it must have only one layer and a transparent background. 14. To ensure our image meets these requirements choose Layers/Merge/Merge Visible. When we started we used a 400x400 work area but did not make our heart large enough to fill it, we therefore have lots of unused space. This unused space will take up space and make our image much larger then it needs to be, so lets get rid of the unused space. 15. Choose Edit/Copy. 16. Edit/Paste/As New Image. A new smaller window will open but our image is actually still the same size, it just uses less space. 17. To save it as a tube choose File/Export/Picture Tube. A window similar to the one below will pop-up. The only thing you have to do in this window is give your image a name. In the box that says Tube Name type in your name for the tube. (I used Heart2 because I have more than one.) Then click OK.
That's it we are done. I hope you enjoyed working with this tutorial. Happy Creating Eaglefeather |
The Back button was made from the heart tube created with this tutorial. The size was set at 30 and a white border was added.
|
|
The entire contents of this page � Robert Valiquette, aka Eaglefeather, January 2001.
All rights reserved.
