Lake Animation
Using only PSP
For PSP 6 and 7.

You may print this tutorial for your own personal use.
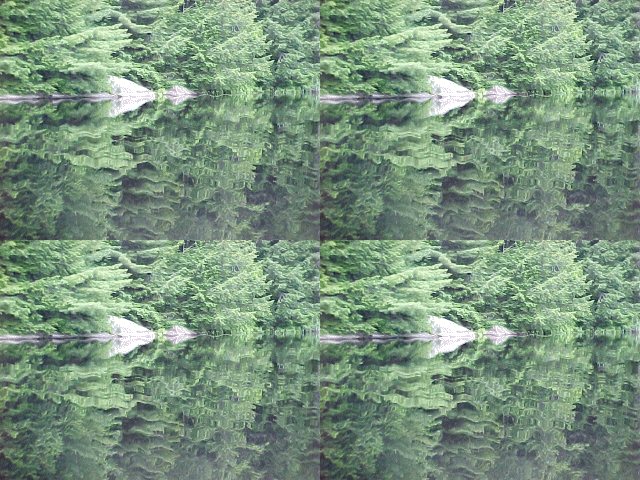
This tutorial will show you how to animate a body of water, or other object, without a plugin or java applet.
A lake or other body of water may also be animated with PSP Wave/Deformation using Horizontal settings rather than Verticle settings. The resulting effect is much different. My good friend Janet at Fantasy Inspirations has a tutorial that explains this proceedure. If you would like to give it a try, and I do recommend it, then please visit Fantasy Inspirations. You will also find some other really great tutorials there.
For this tut you will need an image that has a body of water to animate. Use one of your own or you may download the image I'm using to your harddrive. Go here to get the image. Use your browser "Back" button to return here.
Let's begin.
1. Open the image you have chosen in PSP.
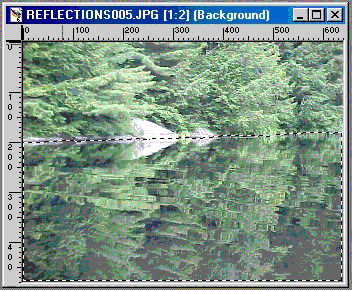
2. Choose the Freehand Tool (Rope) set to Point to Point, Feather 0, Antialias unchecked. Starting at the left hand side, where the shore meets the water, start selecting the shore line. (For beginners, the Point to Point tool is for selecting areas with irregular borders. Starting at the left edge click once, move along the shore until it curves away then carefully make clicks as you follow the shore. We want the outline of the shore, not a straight line.) Work your way completely across the image. When you get to the right edge, move right down to the bottom right corner, then across to the bottom left corner and finally up the left side to your starting point. Double click and marching ants should outline the selected area. Fig 1.
 Fig 1
Fig 1
3. Go to Windows/Duplicate and duplicate the image 3 times.
4. Use the Magnifyer tool to reduce each of the images to 1:4
5. Place the images side by side in a row.
6. Make the first image active
(NOTE: If you are using PSP7 then choose Effects/Geometric Effects/Wave instead of Image/Deformations/Wave when called for below, however the settings remain the same.)
7. Go to Image/Deformations/Wave/Horizontal Displacement/Amplitude: 0/Wavelength: 1 (Note: the Horizontal Displacement stays the same for each of the images)/Vertical Displacement/ Amplitude: 1/Wavelength: 20. Then Click Ok.
8. Go to Selections/Select None.
9. Make the second image active.
10. Go to Image/Deformations/Wave, use same settings as in step 7, but increase the Vertical Wavelength by 1 to 21. Then Click Ok.
11. Go to Selections/Select None.
12. Make image 3 active.
13. Go to Image/Deformations/Wave again. Increase the Vertical Wavelength by 1 to 22. Then Click Ok.
14. Go to Selections/Select None.
15. Make image 4 active.
16. Go to Image/Deformations/Wave again. Increase the Vertical Wavelength by 1 to 23. Then Click Ok.
17. Go to Selections/Select None.
18. You now have 4 images that have been deformed. You must now save them either in .psp or .gif format. It is very important to keep them in exactly the same order you performed the deformations. Therefore when saving, regardless of what you name each image, be sure to number them. For example, lakeani_1, lakeani_2, lakeani_3, lakeani_4. So go ahead and save them now.
There you go, all the hard work is done. All we have to do now is open Animation Shop and use the Animation Wizard to animate our lake.
Open Animation Shop
1. Click on the Animation Wizard button. fig 2
 Fig 2.
2. Choose, "Same size as the first image frame", from the first popup menu. Then click Next.
3. On the next popup screen choose, Opaque. Then click Next.
4. On the next popup screen choose, "Centered in Frame" and "With canvas colour". Leave "Scale frames to fit - unchecked. Then click Next.
5. On the next popup screen choose, "Yes, repeat the animation indefinitely". For, "How long do you want each frame to be displayed", increase the number to 22. Cick Next.
6. On the next popup screen, Click on "Add Image". Now go to the folder where you saved your four images. Left click once on the number 4 image to highlight it. Press and hold the Shift key then left click once on the number 1 image. All four images should now be highlighted. (Why did I choose the number 4 image first, you ask? Well Animation Shop will take the images in the reverse order of how you chose them. I want the number 1 image to be the first image in the animation, so I chose them in reverse order).
7. Either double click on the highlighted images or press the open button. The images will now appear in the, "Specify Images", box of Animation Shop. Click Next.
8. On the next popup screen just Click on Next.
9. Your images will now appear in the Animation Shop work area. Because we did not resize the images to make them smaller, the first image will almost fill the entire work area. If you want to see all four of the images, click on the magnifying glass then right click on the image. Keep right clicking until all four images appear.
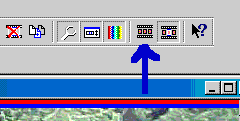
10. Click on the View Animation button, fig 3, to see the result of all your hard work.
 Fig 3.
11. To save your lake animation, first close the running animation by clicking on the X in the open window. Then Go to File/Save As. Give your animation a name and click Save.
You will now be presented with some more popup screens.
12. On the first one make sure the Slider is at the top for, Better Quality Image. Click Next.
13. On the next screen when all the little boxes on this screen fill up, click Next.
14. The next screen gives all the info about your animation. When finished viewing, click Finish.
Your animation is now saved and ready for you to display to the world. Congratulations on a job well done.
I hope you have enjoyed working with this tutorial and that you have not encountered any insurmountable problems. Should you have any comments, suggestions or questions about this or any of my other tutorial's please feel free to send me an email.
Cheers Eaglefeather
