 |  |  |  |
 |  |  |  |
 |  |  |  |
 |  |  |  |
For PSP ver 6, but may work in other versions.
This is my first tutorial. I've used the tut to make 6 ornaments to make sure it is right and to improve it. Then, because I don't trust myself, I had my wife try it. She had never used PSP before, but she was successful, only had to ask me where the various tools were. So if you know where the tools are then you should have no problem.I have only used a minimal number of screen captures and then only where absolutely necessary. For this turorial I will be using the red dot pattern. You may use any pattern, image or photo you like, as long as there are lots of different colours. A very simple method of getting a pattern is to open any image, use Image/Resize to resize the image to 600x600 then go directly to step 6. If you would rather use the Red Dot pattern used in this totorial it is at the bottom of this page. As this host does not permit downloads I have had to provide this as a full size image. To save it just right click on the image and then click on "Save Image or Save Picture As". This will save the image to your hard drive. You will also need an ornament hanger to finish off the ornament. If you already have one great, if not I have provided one at the bottom of this page. Right click on the image then click on "Save As or Save Picture As". This will save the image to your harddrive. To make the ornament hanger image into a tube, open it in PSP. Go to File/Copy. Then go to File/New make a new image 100x100 with transparent background. Go to File/Paste/As New Layer. You may now close the original image it is nolonger needed. Choose the magicwand tool then press and hold the shift key. Now click on the white area and keep clicking as you move around. The idea here is to click on a bunch of the different colours of white that are present. As you click around, preferably in the same area the area inside the "marching ants" will get larger. I used approximately 20 clicks when I tested it. Now release the "shift" key and press the "Delete" key. Most of the white area should be deleted. Now you have the option of using the Magicwand tool and the shift key to choose any remaining white or do as I did and just use the Eraser Tool. Once all the white is gone, Go to Layers/Merge/Merge All. Then Go to File/Export/As Picture Tube. Give it a name and press OK. The hanger will now be a tube. Sorry for the inconvenience but I was unable to find a new free host that permits downloading of files. To make this tut easier to follow you may print it. Make sure your printer is turned on then Click on the Print button of your browser or go to File/print.
2. Open the reddot.jpg or the image you have decided to use. 3. Go to Edit/Copy. 4. Close the original reddot.jpg image. Don't save changes. 5. Make sure your transparent background layer is active and go to Edit/Paste/As New Layer. 6. Go to Image/Effects/Tiles. Use the following settings: Preset - Custom, Choose tile shape hexagon, tile angularity =0, tile size= 8, border size= 1, Smoothness= 25, depth= 1. Click OK. 7. Go to Image/effects/kaleidoscope. If you wish, make the design on your onrnament uniquely your own by playing with the settings, (Particularly Radial Suction and Scale Factor) or use the settings I used as follows; Horizontal offset = 40, Vertical offset = 44, Rotation angle = 128, Scale Factor = -62, Number of petals = 7, Number of orbits = 0, Radial suction = 93. When you are happy with the design, click OK. 8. We will now turn that beautiful square design, that you laboured so intensly over, into a ball. To do this, go to Image/Deformations/circle. Your square design should now be a ball. 9. To give us room for our background and to add on the ornament hanger it is necessary to resize the ball. Go to Image/Resize, click on the Percentage of Original radio button, then change the first setting to 80%. The Resize Type should = Smart Size. If there is a check in the "Resize All Layers" box, turn it off. Turn on the check in the "Maintain aspect ratio" box, and set to 1. Click OK. 10. Click on the Mover tool, place the cursor at the center, bottom of your ball, and move it down until the bottom of the ball is at the 300x570 position. (Note: The bottom does not have to be exactly at 570 just be sure you have room at the top for the hanger, but you must keep the ball centred on 300.) 11. Create a new Rastor Layer, name it Ornament top. 12. Create a new Rastor Layer, name it Hanger. 13. With the Hanger layer the active layer, go to Tubes and choose the ornament hanger. Change the scale to 70. Place the cursor at 310x50 and left click once. Your hanger should now be centred approximately 30 pixels above the ball, (fig 1).
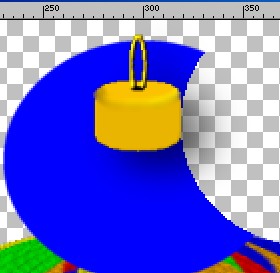
fig 1 14. Activate the Ornament Top layer. 15. Set the foreground colour to blue (#0000FF) or colour of your choice. 16. Choose preset shapes tool - Ellipse, filled, 1, antialias checked. 17. Place cursor at 300x70 and draw an ellipse to 370x130. 18. Use magnifyer tool to magnify to 2:1. 19. Choose eraser tool - Round, size 120, hardness - opacity & density 100, step 25. Place the eraser on the right side, so that it is against the ornament hanger and just touching the ball, click once. You should now have a bite out of the blue elipse as in fig 2.
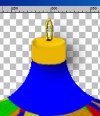
fig 2. 20. Now do the same thing on the left side of the hanger. 21. Change the eraser size to about 90. Place the eraser cursor overtop of the ornamnet hanger so that all of the blue above the hanger is covered. Note: Do Not extend it down to cover any of the blue below the hanger. Then click once. Your image should now look like fig 3.
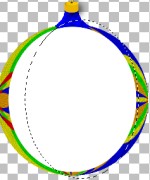
fig 3. 22. Go to Image/effects/texture - settings are: Custom, texture 55, 94%, smoothness=29, depth=5, ambience=0, shineyness=0, color=white, angle=315, intensity=53, elevation=27. Click ok. 23. Go to Layers/merge/merge visible. 24. Go to Selections/Select All. 25. Go to Selections/Float. You should now have marching ants all around the ball. You must do the selection this way for the next effect. It will not work using the magic wand. 26. Go to Image/Effects/Cut Out, use whatever settings give you a shadow effect you like. But make sure the, "Fill Interior with Colour" box is NOT checked. The "Shadow colour" may be whatever you like, just click inside the box to make a change. I used black and the following settings: Opacity = 50, Blur = 50, Offset vertical = -25, Horizontal = -25. Go to Selections/Select None. 27. Add a new rastor layor. Name it, reflection, if you like. 28. Set the foreground colour to white, or colour of your choice. 29. Go to preset shapes, ellipse, filled, linewidth 1, antialias checked. Place cursor at 300x340 and draw an ellipse to 500x570. 30. Choose the selection tool. Ellipse, feather 0, antialias checked. Place cursor at 330x340 and draw an ellipse to 510x590. Your selection should look something like fig 4. Then push the delete key.
fig 4. 31. Go to Selections/select none. 32. Select Image/blur/gaussian blur. Set radius to 10:00. Click ok. 33. Go to the Layers palette. Move the slider to set opacity at approximately 50. (fig 5)
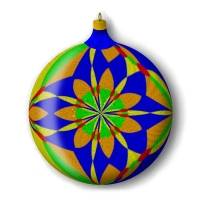
fig 5. 34. Now go to Layers/merge/merge visible. 35. Select the magic wand tool. Click on a transparent portion of your image. Look for any large areas of semi transparent pixels, including around the ornament hanger and the drop shadow it created. These should be removed with the eraser tool. 36. Go to Selections/select all, then go again and select Selections/float. 37. Go to Image/effects/cut out. Use whichever settings give you a shadow effect you like. Make sure the Fill Interior with color box is not checked. The shadow colour may again be whatever gives you an effect you like. Click inside the colour box to make a change. I used black and these settings: Opacity =0, Blur= 50, Offset vertical= -25, Horizontal= -25. 38. Go to Selections/select none. 39. Now all you have to do is add your background, then merge the layers and your ornament is finished. One final note. It is not necessary to make this ornament at 600x600. I realize this is very big, however I found it much easier to work with at this size. When I was finished I just resized it down to 400x400. I hope you have as much creative fun with ornaments as I have. The variation of designs are limitless using Kaleidoscope and the reddot.jpg. Experiment with all the different settings, you will be amazed by the results. You might also want to experiment by making your own colourful graphic, (like the reddot). For example if you wanted an ornament all done in red and white or red and green, then make a pattern graphic in those solid colours. The more colour variation you use the more interesting the final design will be. Cheers Eaglefeather |
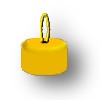 Ornament Hanger tube |
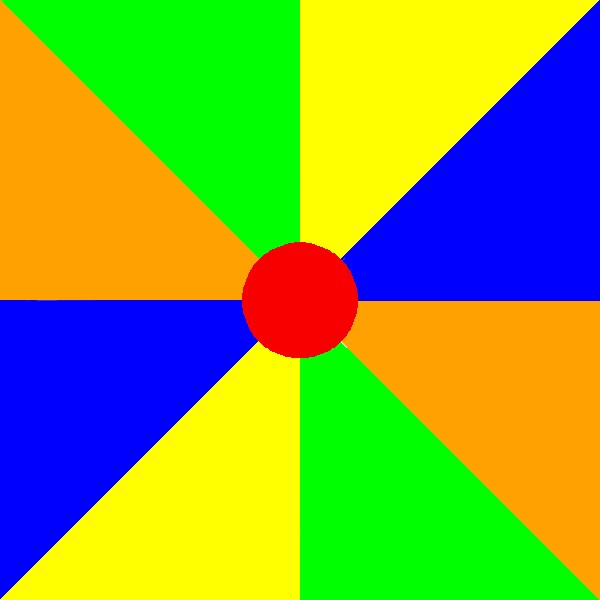 Red dot. jpg |
|
|

This tutorial copywrite, Robert Valiquette, Novemeber 2000.

