How to Achieve a Gold Effect
using just PSP 6 or 7.
No add on filters required
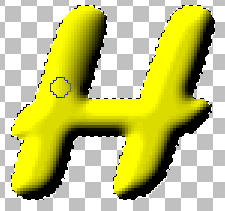
The secret of achieving the gold effect using the "Chrome" effect, which is a standard filter within PSP 6 & 7, is to make sure the object you wish to guild has some shading. In other words a solid colour can not be guilded.This short tutorial will run you through the basic process. 1. Open a new image 400x400/Transparent/16mil colours. 2. Set the foreground colour to bright yellow. 3. Choose the Text Tool/(use a bold or thick font. I used Forte here)/Size 72. Add a word to the work area, I used the word, Hello. 4. Use the Mover Tool to move the word to the top and center. 5. Go to Image/Effect/Inner Bevel, (PSP 7 users use Effects/3D Effects/Inner Bevel). Use whatever setting you like. I used Round/Width 6/Smoothness 15/Depth 7/Ambience 0/Colour white/ Angle 315/Intensity 43/Elevation 30. Note: Changing these settings will directly effect how your object will be guilded. So you will have to play with these settings to achieve the desired effect. 6. Choose the Retouch Tool/Round/Soften/Size (I used 7, you will have to use a size compatable with the size of the font you used)/Hardness 100/Opacity 100/Step 25/Density 100. Quickly go over all the stark edges to smooth everything out. Doing this will give you a much cleaner, more pleasing guilding. Fig 1 shows how I have smoothed out the left, top arm of the letter H and am moving down. Try not to overdo it.
7. Go to Image/Effects/Chrome, (PSP 7 users go to Effects/Artistic Effects/Chrome), and use these settings Flaws 5/Brightness 35/Colour FFCC01. 8. You should end up with your word guilded as in fig 2. Playing with the settings of both Inner Bevel and Chrome will give you different guilding effects.
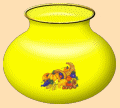
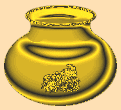
This method may be used for lines, frames, and borders, individual objects made with rectangle, ellipse, circle etc. Now what about that beautiful vase/bowl you made. Can it be guilded? Yup...it can and without all the mess we just went through for the text, here's how. 1. Open a New/Image/Transparent/16mil colours, the size is up to you. 2. Place the image you want to guild in the work area. I will be using a vase I made quite some time ago. See fig 3. 3. Go to Chrome in whichever PSP ver you are using. Use the same settings we did before or change them to suit your fancy. Figs 3 and 4 show the before and after.
That's it. Done. Just as an after thought. This same method may be used to achieve other metalic or highly reflective effects. Just change the "colour" in the chrome settings. Play with it and have fun. Cheers Eaglefeather |
|
|
The entire contents of this page � Robert Valiquette, aka Eaglefeather, 2001.
All rights reserved.
 Fig 1.
 Fig 2.
 Fig 3
Fig 3 Fig 4
Fig 4